Manually
Setting Up a Node on the Chavinci Network
Welcome to the guide on setting up a node for the Chavinci Network. This step-by-step tutorial will walk you through the process of deploying your node on a server using Digital Ocean as an example. However, these steps are generally applicable to any server provider you choose.
Hardware and OS Requirements
Chavinci is an incredibly lightweight protocol, so nodes can run on commodity hardware. Note that as network usage increases, hardware requirements may change.
- CPU: Equivalent of 2 CPU
- RAM: 2 GB
- Storage: 20-40 GB SSD
Prerequisites
We recommend supported operating systems:
- Ubuntu 20.04
- Ubuntu 22.04
1. Server Setup
-
Account Creation:
Begin by navigating to (https://www.digitalocean.com) or your chosen server hosting site. If you're new, you'll need to create an account, or simply log in if you already have one. -
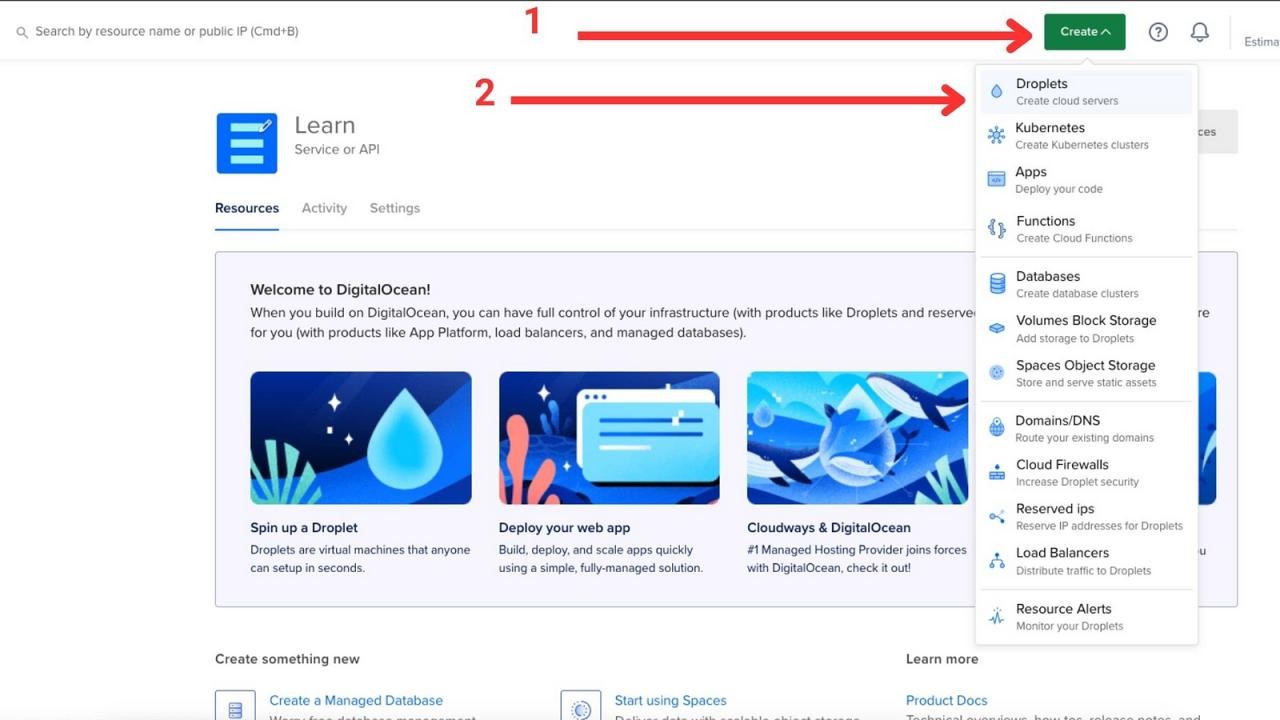
Creating a Droplet:
- Click on the “Create” button in the top right corner, then select “Droplets” from the dropdown list.
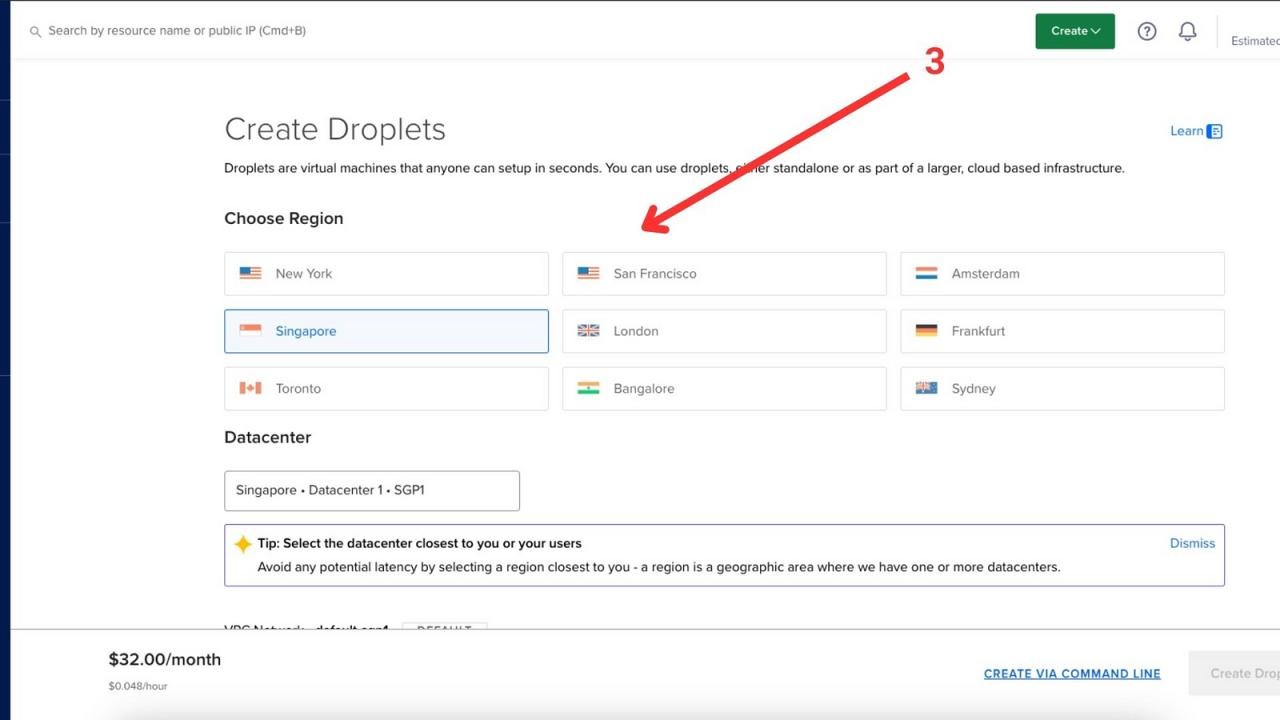
- Choose a server location that suits your needs from the list of available countries.
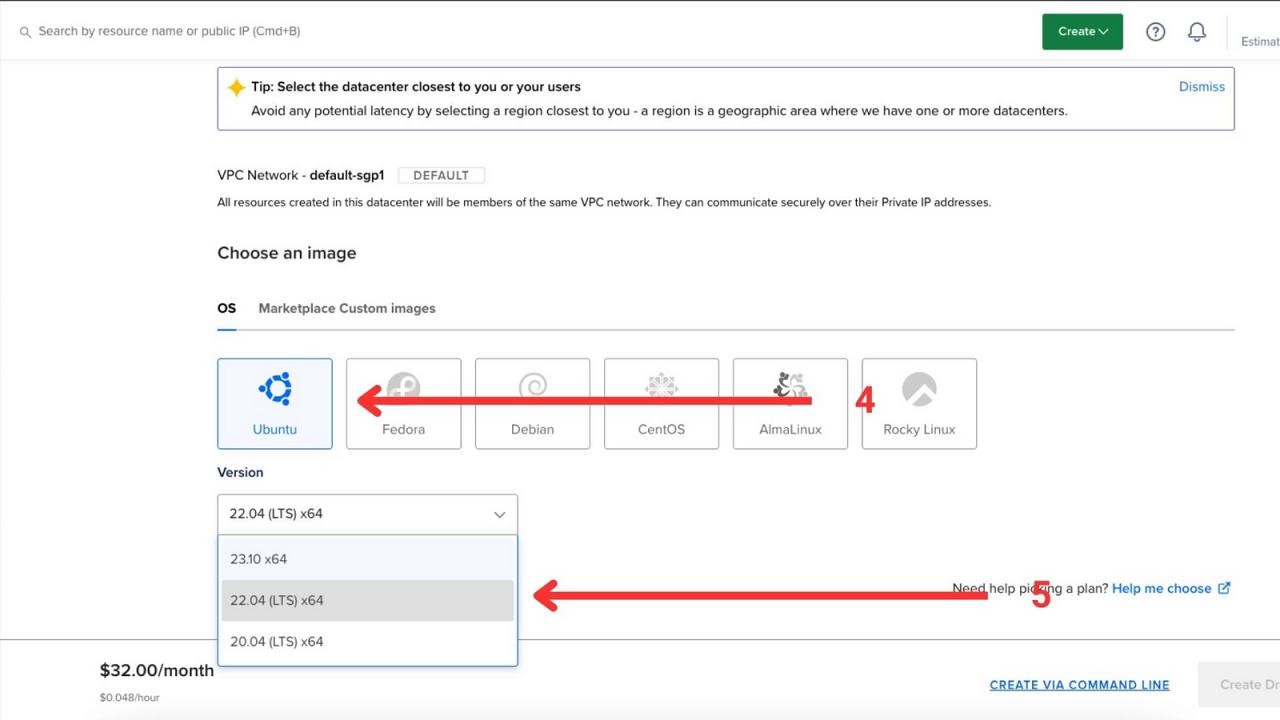
- For the Operating System, select Ubuntu. 4. Opt for the 22.04 LTS (x64) version for optimal stability and performance.
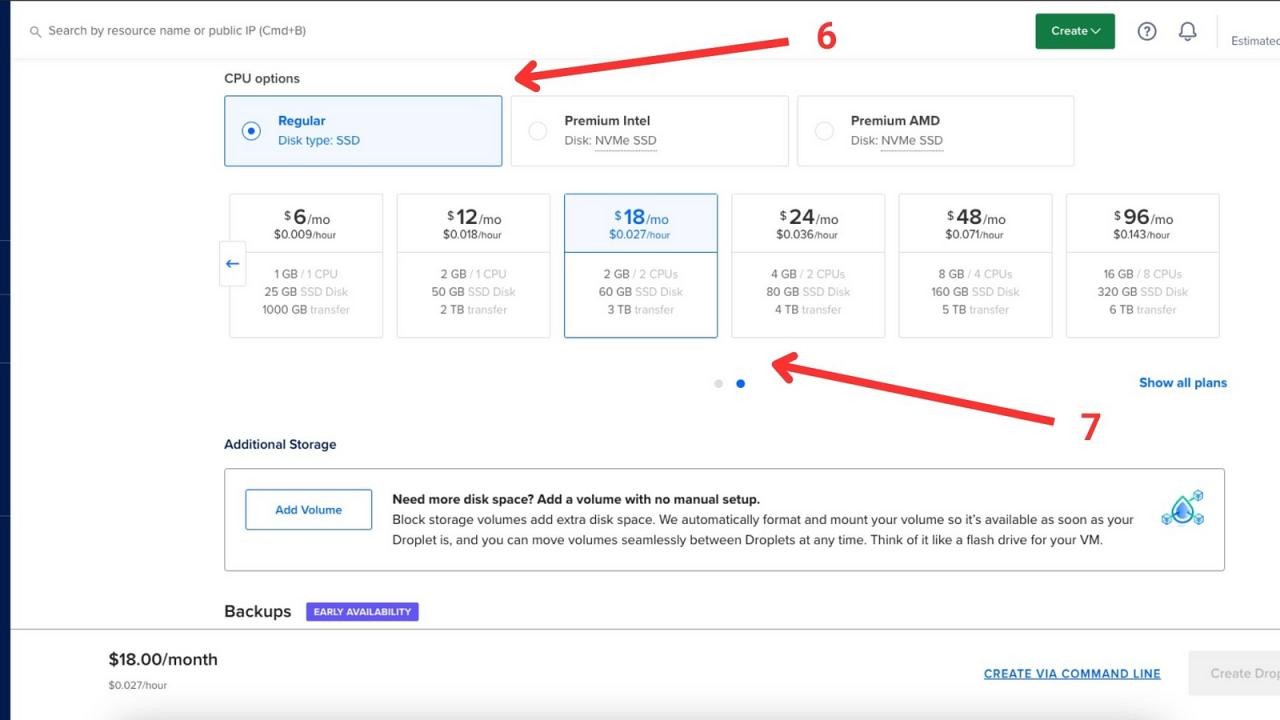
- In the “CPU options” section, select the basic “Regular — Disc Type: SSD”. You may choose a higher model for increased processing power, enhancing your node’s performance within the network. 6. Recommended specs for optimal operation are 2 GB of RAM and 2 CPUs. However, the minimum viable specs are 1 GB of RAM and 1 CPU, though this is not advisable for optimal performance.
- For the “Choose authentication method” section, select “Password”, although SSH keys are also an option. 8. Set your password.

- Click on the “Create” button in the top right corner, then select “Droplets” from the dropdown list.
-
Finalizing Details:
- Enter a Host name of your choosing. This can be any name you prefer. — Click on the “Create Droplet” button to proceed. Once created, you’ll be directed to the “Learn” page.
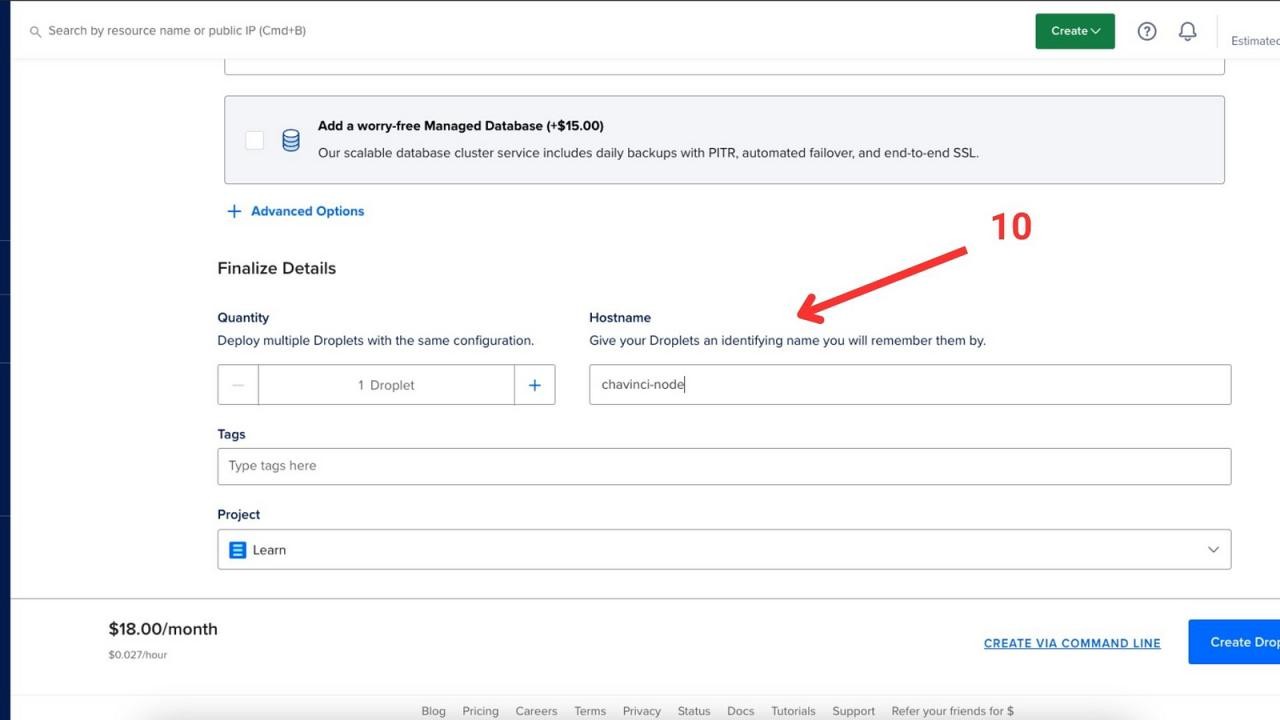
- Enter a Host name of your choosing. This can be any name you prefer. — Click on the “Create Droplet” button to proceed. Once created, you’ll be directed to the “Learn” page.
2. Node Installation
-
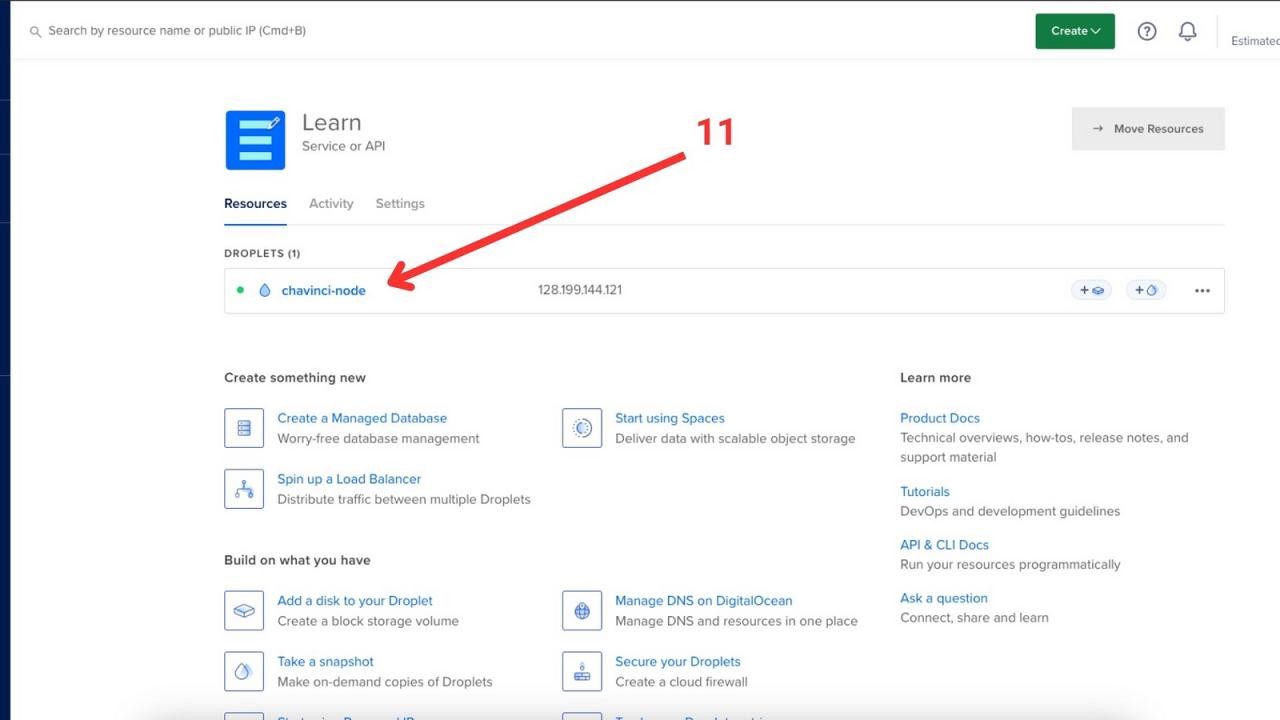
Accessing Your Droplet:
- Click on the newly created droplet that bears the name you assigned.
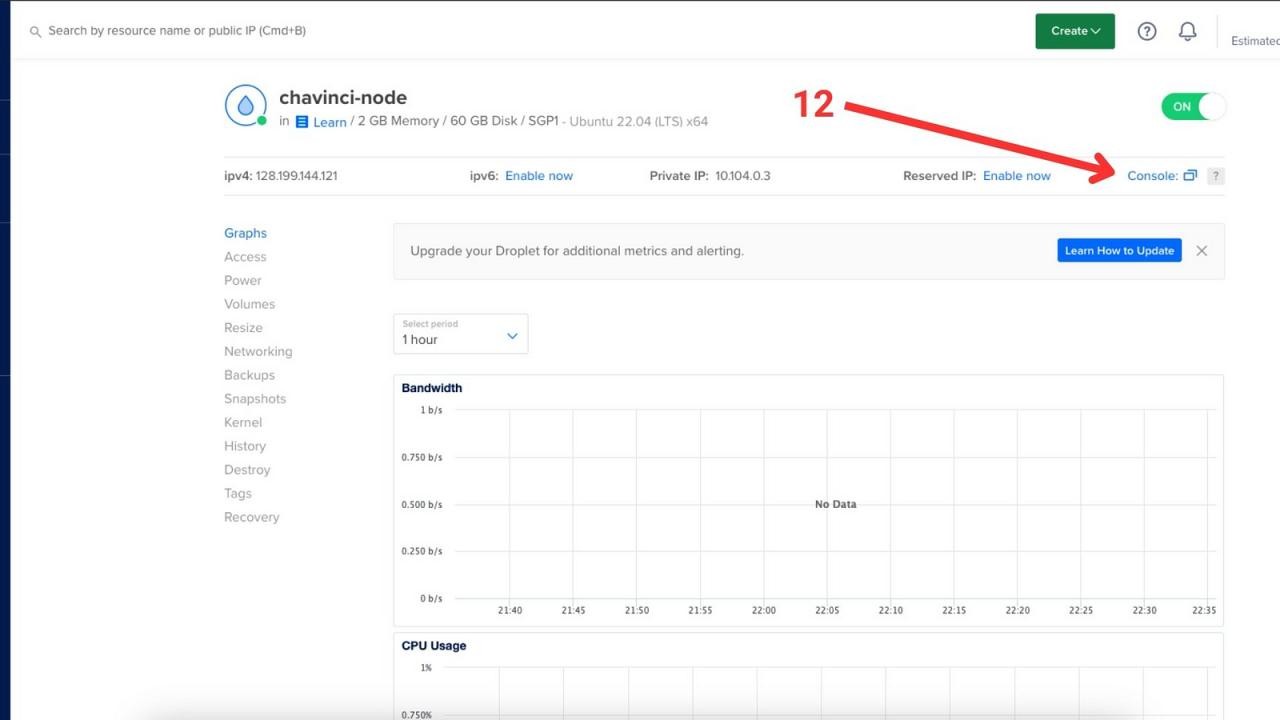
- Click on the "Console" option to open a new terminal tab.
- Click on the newly created droplet that bears the name you assigned.
-
Executing Commands:
- Download the Chavinci software package using
wget https://github.com/chavinci-chain/chavinci-releases/releases/download/1.0.3/chavinci-linux.zip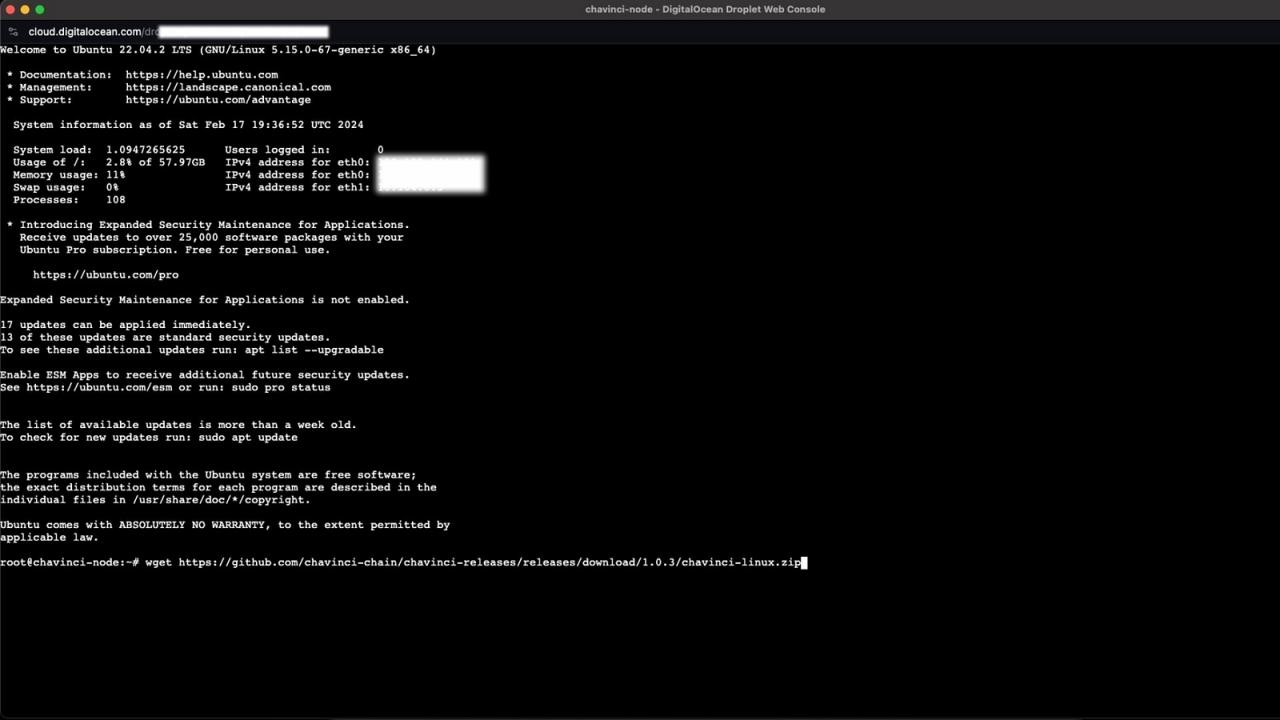
- Install unzip if not already available:
apt install unzip. When prompted, select the[*]packagekit.serviceoption and click. 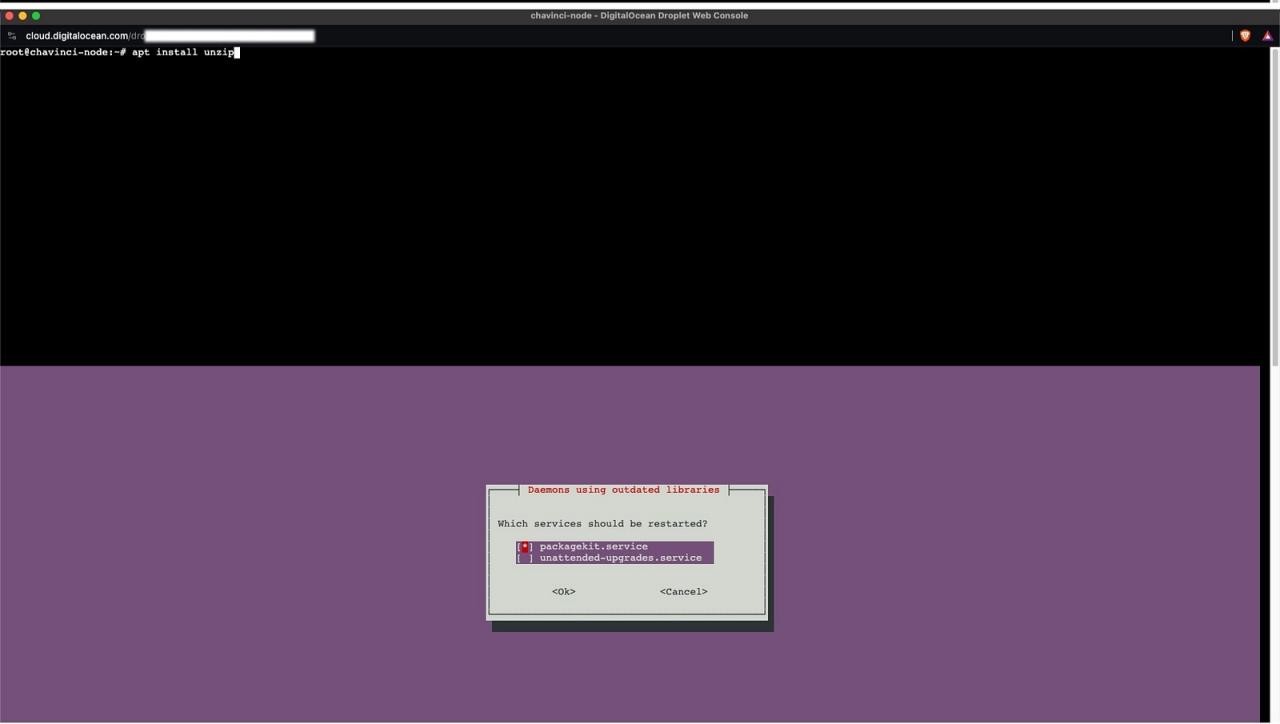
- List the directory contents with
lsto verify the download.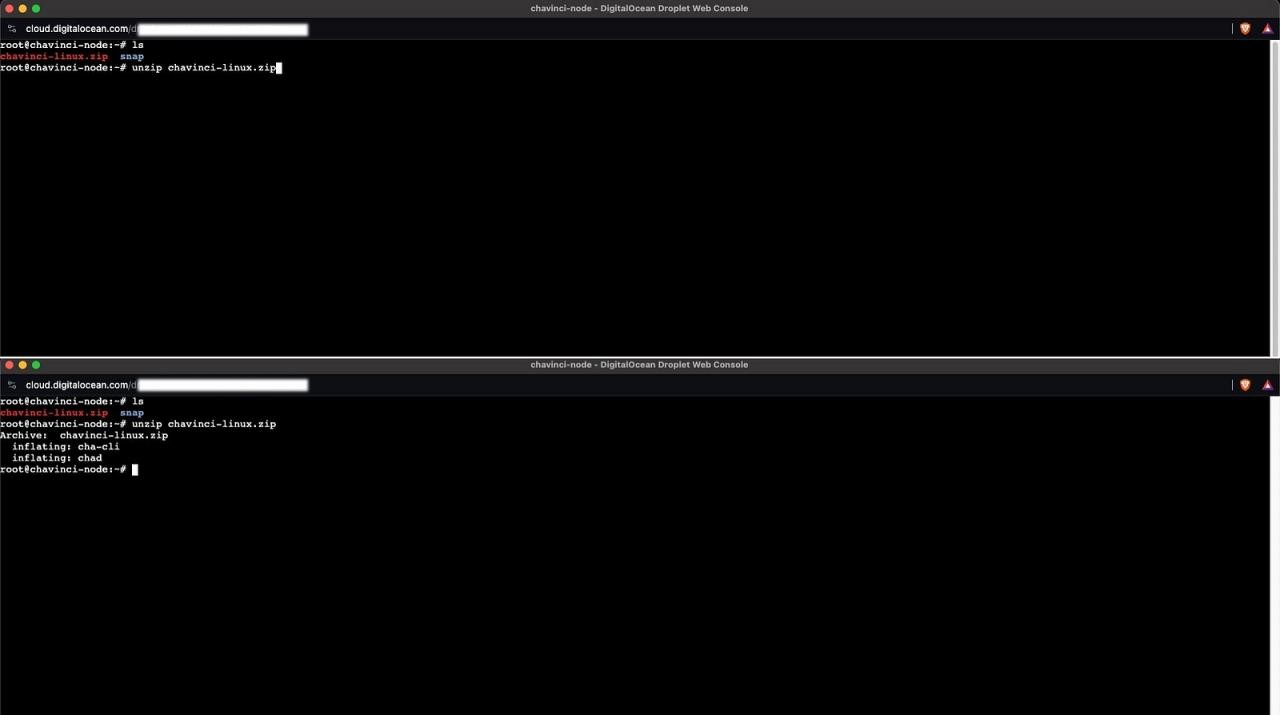
- Unzip the downloaded file:
unzip chavinci-linux.zip. - Create a directory for the blockchain data:
mkdir ~/.chachain, and navigate into it withcd .chachain.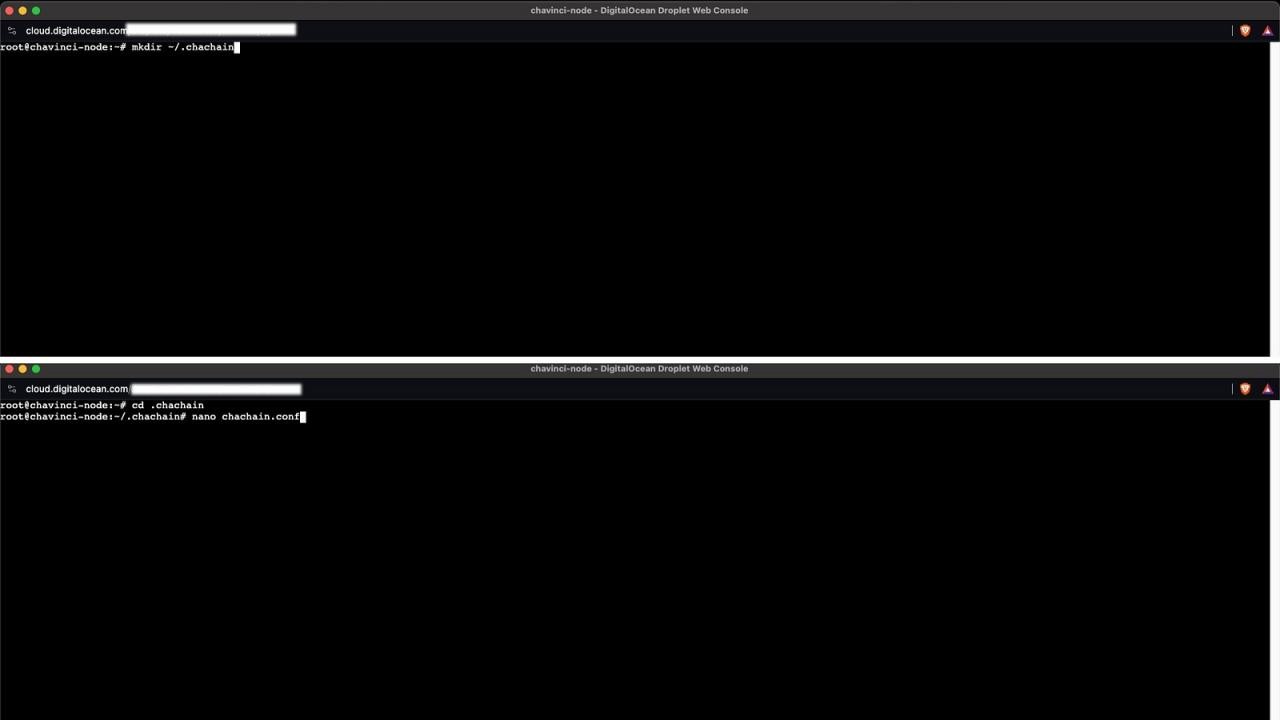
- Generate a configuration file:
nano chachain.conf. This will open a text editor.
- Download the Chavinci software package using
-
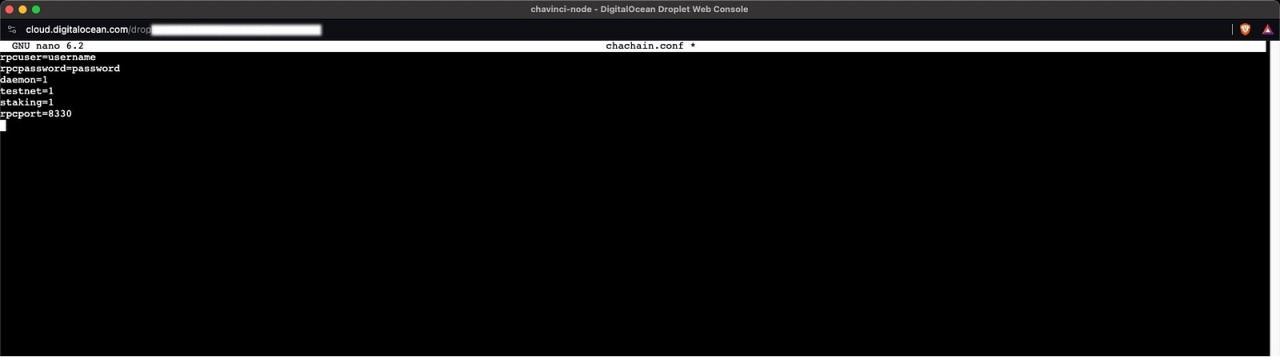
Configuration:
In the editor, input the following configuration, replacing the placeholders (indicated by "") with your specific details:
        rpcuser=username   #Change "username" to your desired RPC username
        rpcpassword=password  #Change "password" to your desired RPC password
        daemon=1
        testnet=1
        staking=1   #Set to 1 to enable staking, 0 to disable, or remove the line entirely.
Save the file and exit the editor.
-
Launching the Node:
-
Exit the
.chachaindirectory withcd ...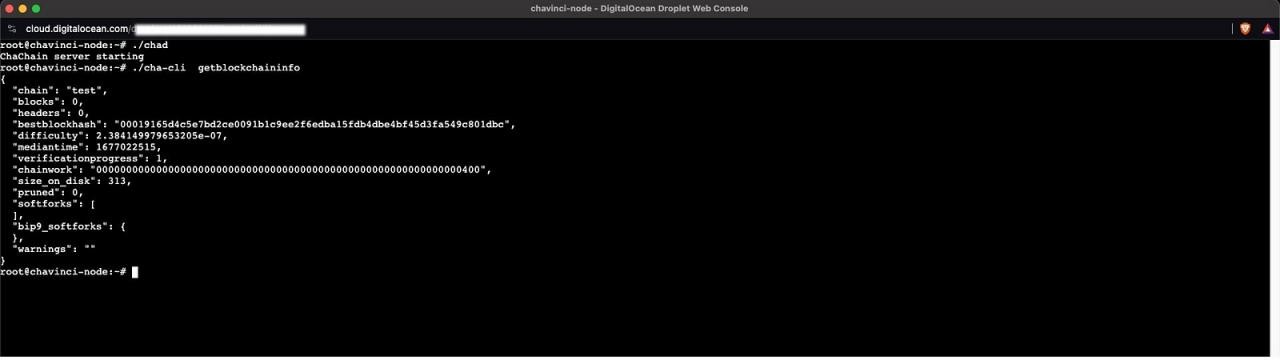
-
Start the node using
./chad. You should see a message indicating that the "ChaChain server is starting". - Verify the node operation with
./cha-cli getblockchaininfo.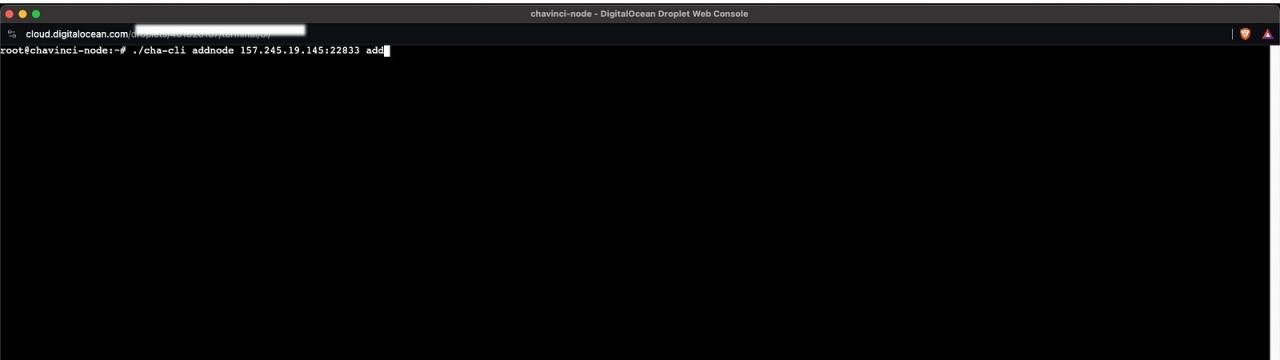
-
-
Connecting to Peers:
- Add your node to the network by connecting to other master nodes:
    ./cha-cli addnode 157.245.19.145:22833 add
    ./cha-cli addnode 146.190.207.106:22833 add
    ./cha-cli addnode 139.59.207.170:22833 add

Note
Nodes are synchronized with the master node after 60 blocks, which is also pertinent for validating stake transactions.
- Receiving an Address:
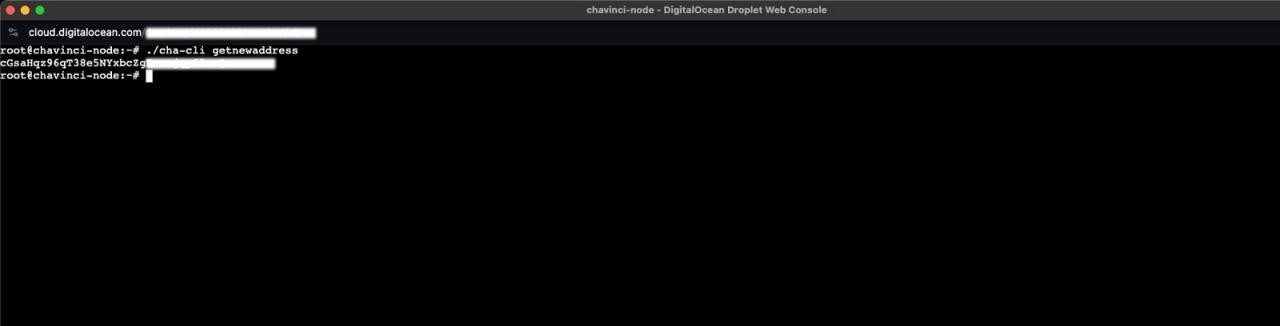
- Once fully synchronized and operational, use
./cha-cli getnewaddressto generate a new address. You can now send CHA to this address, initiating the verification process and earning rewards for each validated block.
- Once fully synchronized and operational, use
This guide aims to provide a clear and straightforward pathway to setting up a Chavinci Network node. Follow each step carefully to ensure a smooth setup process and successful node operation. Happy staking!